Rain Station: Drip Irrigation System
Gardens are often centers of social convergence for growers who collaborate in producing food sources while sharing the knowledge of their horticultural expertise. In addition to the productive yield that defines the garden space, it has throughout history been a center for aesthetic enjoyment for variety of social groups, including the general public. Those who invest their time in the meticulous care required to produce a flourishing garden, rely on an effective means of irrigation and fertilization. Communities and organizations responsible for maintaining our urban gardens are required to be particularly inventive, compensating for the inherent lack of space fertile space that defines the city by nurturing growth in the soil that lies among the building structures and sprawling asphalt surfaces.
Although cultivating gardens on a smaller scale generally assumes relatively modest yields when compared with larger land plots that are the norm in rural agricultural productions, it also provide a means to more easily manage the maintenance involved in successful plant growth. To afford the urban grower with a more effective means of watering groups of plants in a confined social space I have created the Rain Station gravity irrigator which provides an ongoing water source to up to eight plant areas at one time. It invites cooperation and social interaction by providing a center of convergence as to a group of gardeners in a community setting as well as providing the individual gardener with a water source for up to 8 separate areas that may be as far as 10 feet from the station.
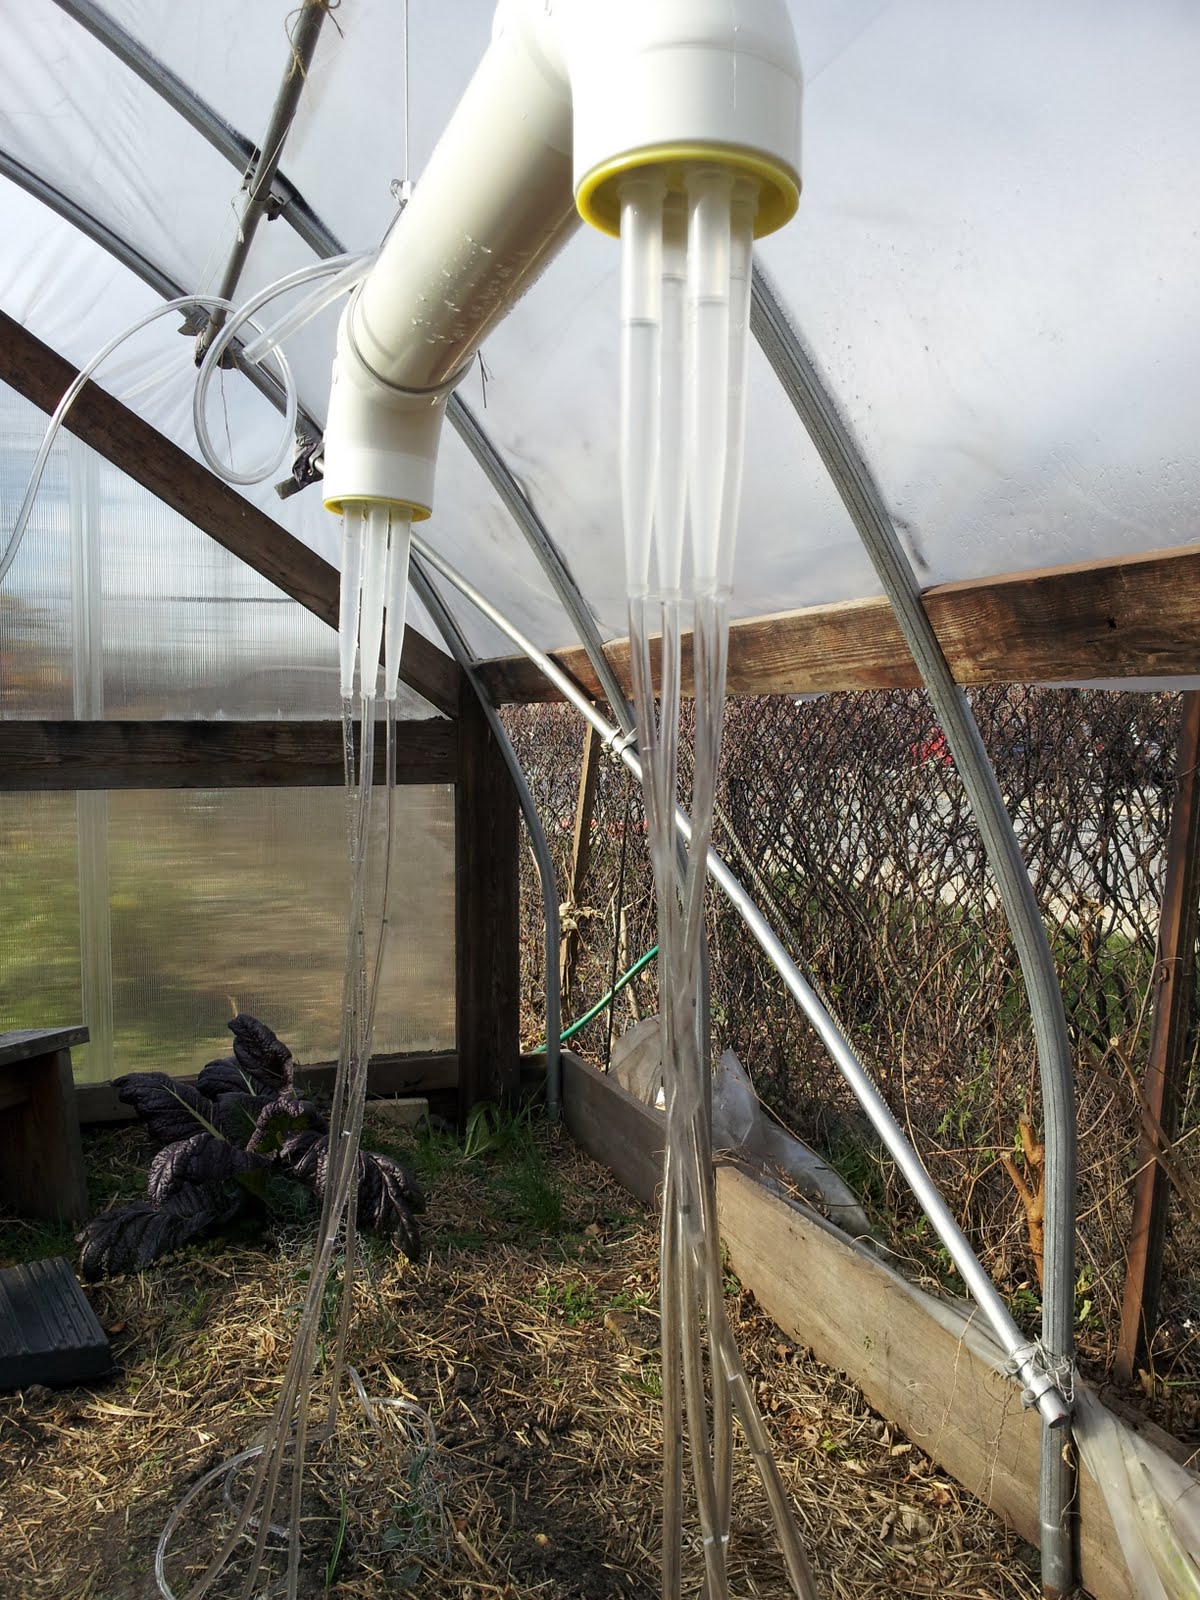
The main body of the unit is made up of a 3 foot length of 4 inch white PVC tubing, with a 90 degree PVC Elbow connector attached at each end, so that they create a symmetry to the form. Covering each of these ends is a PVC cap. In the finished kit, these can either be glued permanently in place or can be fitted with a wide rubber band and forced tightly into the opening of each elbow. This design has proven to stay securely in place and are sufficient to secure the unit against leaking once it is filled with water. Baster tubes are fitted into 4 holes in each of the PVC caps and are secured in place by the lip at the larger opening of the baster. A 10 foot length of vinyl tubing is fitted to tip of each baster and equipped with a with a 0.5 gph (gallons per hour) spot watering emitter at the opposite end that regulates the rate of water provided to the plants. The threaded 3/4” circular opening at the top of the unit enables manual filling or can be used to modify the unit into a “rain fed” self-filling system when fitted with additional hosing.
The appearance of the kit is designed to fit with a modern urban aesthetic, that could compliment the white minimal aesthetic of a greenhouse interior or an outdoor garden that features a more contemporary modular appearance.
Featuring only a modest number of parts of no more than 3 feet in length, the Rain Station kit can easily be easy shipped to anywhere in the world and assembled in under an hour. With tubing branching out to deliver the water to multiple sources at a time, the Rain Station irrigation kit design serves as a model of resource conservation for how the collective can lessen water usage by regulating its dispersal to specific locations it is needed while also cooperating in harvesting a renewable resource through crop cultivation.
Kit Contents
http://www.pvcfittingsonline.com/450-015-1-1-2-schedule-40-pvc-plug.html?___store=default
(2) Oatey 4 in. ABS Insert Test Cap with Knockout Model # 39103 Store SKU # 508288 $0.35 /EA-Each (Home Depot)
(1) 4 in. x 2 ft. PVC Sch. 40 DWV Foam Core Pipe $6.56
http://www.homedepot.com/h_d1/N-5yc1v/R-202018044/h_d2/ProductDisplay?langId=-1&storeId=10051&catalogId=10053
(2)"CHARLOTTE" PVC/DWV *Street elbow 90 degree *Schedule 40 *Bulk *Discovery CON, NBR, SUP *4" $5.54
http://www.acehardwaresuperstore.com/1203-pvc-dwv-fittings/36170.html
(8) Turkey Baster Family Chef Basting Set $1 (The Family Dollar
(1)OATEY 8Oz Lovoc Pvc Reg Clear Cmt By Oatey $2.62
http://www.acehardwaresuperstore.com/2303-plastic-cements-cleaners/58375.html
(1) "DAP" SILICONE HOUSEHOLD ADHESIVE SEALANT *2.8 Oz $3.48
http://www.acehardwaresuperstore.com/2827-pure-silicone/51510.html
Industrial Grade 1MNF6 Hex Head Plug, 3/4 In, Threaded, Blk Steel $1.67
http://www.amazon.com/Industrial-Grade-1MNF6-Threaded-Steel/dp/B001GBPUYS
3/8" ID Clear Vinyl Tubing (100') $8.40
http://www.pexsupply.com/DiversiTech-7-38-3-8-ID-Clear-Vinyl-Tubing-100
(8) Rainbird Rain Bird Corp. Consumer SW05/10PK Spot Watering Emitters $4.25 http://www.sears.com/shc/s/p_10153_12605_SPM2165191501P?prdNo=1&blockNo=1&blockType=G1
Total: $44.96
Tools required: pen, Protracter, Ruler, electric drill, 3/4in spade bit. 11/16 spade bit.
Distribution & Availability

Assembly Instructions, Sketches and Documentation
1. Cut Vinyl tubing into 8 10Ft lengths with a box cutter or scissors.
2. Positioning it on a flat surface, position one of the 4” PVC Knock-Out Caps and place on its face so that the back is facing up.
3. With the protractor positioned on the center protrusion, draw a line on the diameter across the cap. (Note: before drawing your first line, be sure that the line will sit with at least 1/2 clearance from the protruding tab on the opposite face of the cap. This will assure that drilling the holes in the next steps will not be a problem).

4. Lining up the newly drawn line to the center 90 degree mark on the proctractor, draw another line across the cap so that you have drawn an “X” across the center with 90 degree angles.
5. Using the ruler, place a small mark 1 inch from the center on each of the 4 lines that now extend from the center of the cap.

6. Repeat steps 2 through 5 with the second knock-out cap.
7. Using a power drill with a 11/16” spade bit, carefully drill a hole on each of the 4 marks that were created in step 5.


8. Repeat step 7 with the second knock-out cap.
9. Detach the rubber bulb from each of the 8 turkey basters so that you are left with only the tapered tube portion.
10. Will some force, carefully push the wide end of the baster tube so that it pops into a hole in one of the knock-out caps (so that lip of the wide end is just exposed through the side of the cap that we made measurements on.

11. Repeat step 10 until all of the baster tubes are positioned securely in the 4 holes in each cap.

12. Using the Silicone Sealant, add a wide bead to the outer edge of the where each of the tube ends meet the cap. (Allow the silicone on each cap to dry for 48 hours before exposing to water).

13. Repeat this process on the other side of the cap.


14. Measure to the mid-point of the 2 foot PVC Tube and make an “X” mark with a pen or pencil.
15. Using the power drill with the 3/4” spade bit, carefully drill a hole into the tube.

16. Using the steel hex head plug, screw the plug into the hole with a wrench so that it creates a thread in the hole.
17. Remove the steel plug and replace it with the PVC plug.
18. Apply a generous layer of PVC cement the to inside ring of the larger opening of the one of the PVC elbows.


19. Fasten the 90 degree adapter securely over one end of the PVC tube so that the center plug is facing 180 degree opposite the opening of the elbow.

20. Repeat Steps 17 and 18 while attaching the other PVC elbow to the tube. If done correctly the unit should now be able to rest upright on the two openings in the PVC elbows.


21. After 48 hours, apply a layer of PVC cement to the outside wall of the knock-out cap.

22. Fit securely into the opening of the PVC elbow so that baster tubes are protruding away from the unit.


23. Repeat steps 20 and 21 as you attach the other knock-out cap.

24. Note: This next step must be done with much care. Twist and push each vinyl tube opening until 1/2” covers the pointed end of each of the 8 baster tubes. To do this without damaging the silicone seal you must apply enough counter pressure with your other hand to negate the force against the tube base. Excess pressure and movement against the base could damage the silicone seal and allow water to leak from the unit. If this occurs. Drain the unit. Once it is dry apply sealant to the edge of where the tubes project out of the knock out-cap.


Note: You may find it easier to attach the nylon tubing before adhering the knock-out caps into place (as shown below)


25. Silicone the black tip of the spot watering emmiters into the opening at the end of the nylon tubing.

26. If all glue and sealant was applied correctly, the unit should be completely sealed and should retain water after the 48 hour dry time.
27. Apply water into the unit through the 3/4” threaded hole in the top.
28. Elevate with nylon rope or straps several feet above the watering area.

Phase 3 - On-Site Installation Documentation: Greenhouse at University of Illinois Chicago


